
My New DIY Ironing Station: The Ultimate Pink Kobalt Cart Hack!
Let’s face it: if you sew or craft, storage and workspace are premium commodities. We dream of sprawling cutting tables and perfectly organized shelves. But one of the most critical—and often most frustrating—parts of our setup is the pressing station. We all know that good pressing is the key to beautifully made, professional-looking garments, but finding the right setup can be a real challenge.
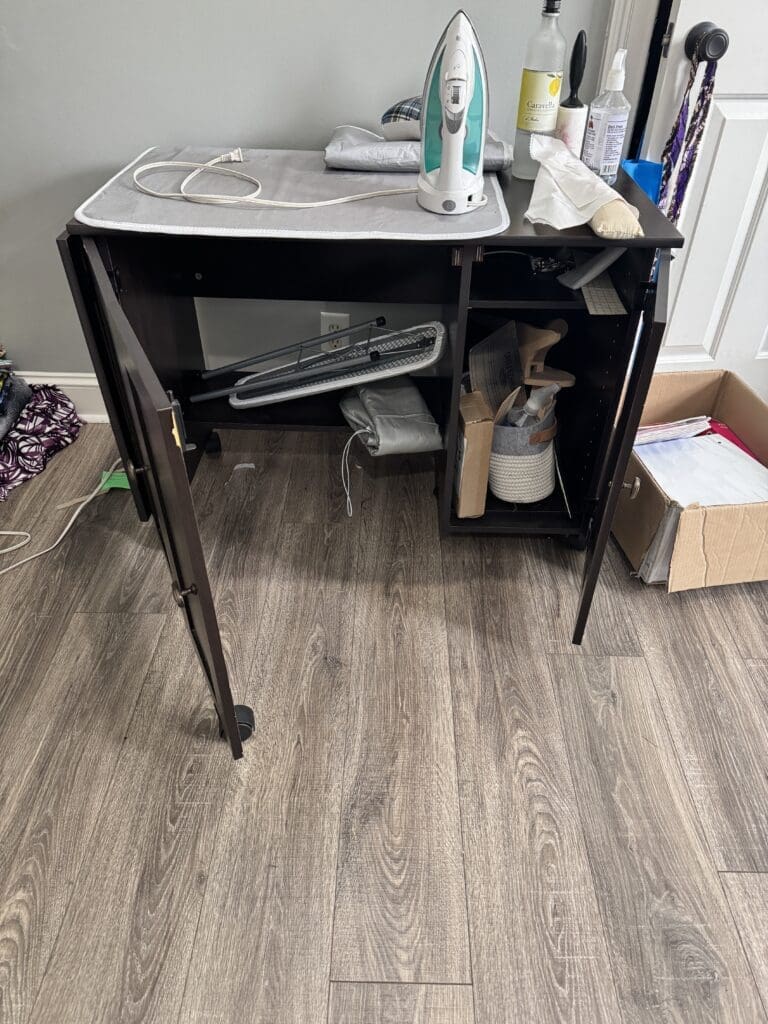
For years, I was ironing on a Saunders expandable wheeled sewing table, covered with a makeshift ironing pad. It was a less-than-ideal situation. First, it was the wrong height and much too low, creating an ergonomic nightmare for my back. Secondly, as I pressed with steam, despite the protective pad, moisture eventually cracked the surface of the table, making it uneven. And let’s be honest, traditional ironing boards are flimsy and small—they simply can’t handle my creative intensity! I needed a real solution: something sturdy, at the right height, with built-in storage.
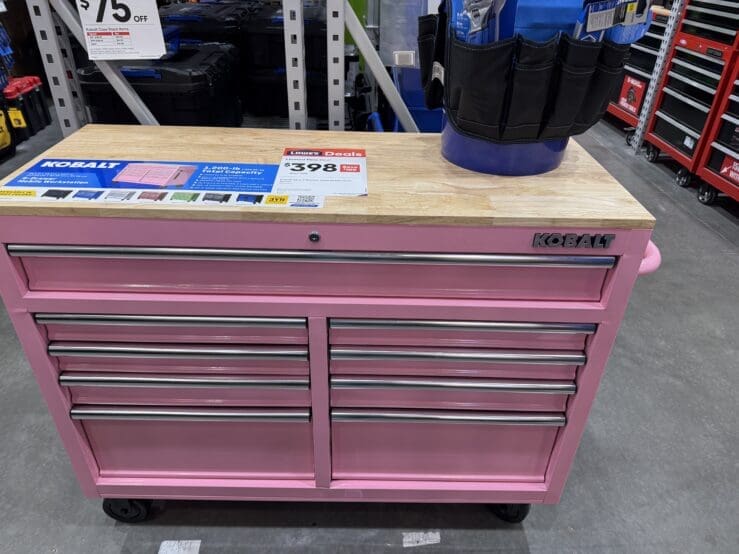
Then one day, while I was perusing Lowe’s with my husband, I saw it. A bright pink Kobalt tool cart on wheels. It had 11 drawers, a built-in power strip, and it was solid steel. My DIY brain started whirling. I knew I could adapt this pink machine to my sewing dreams.
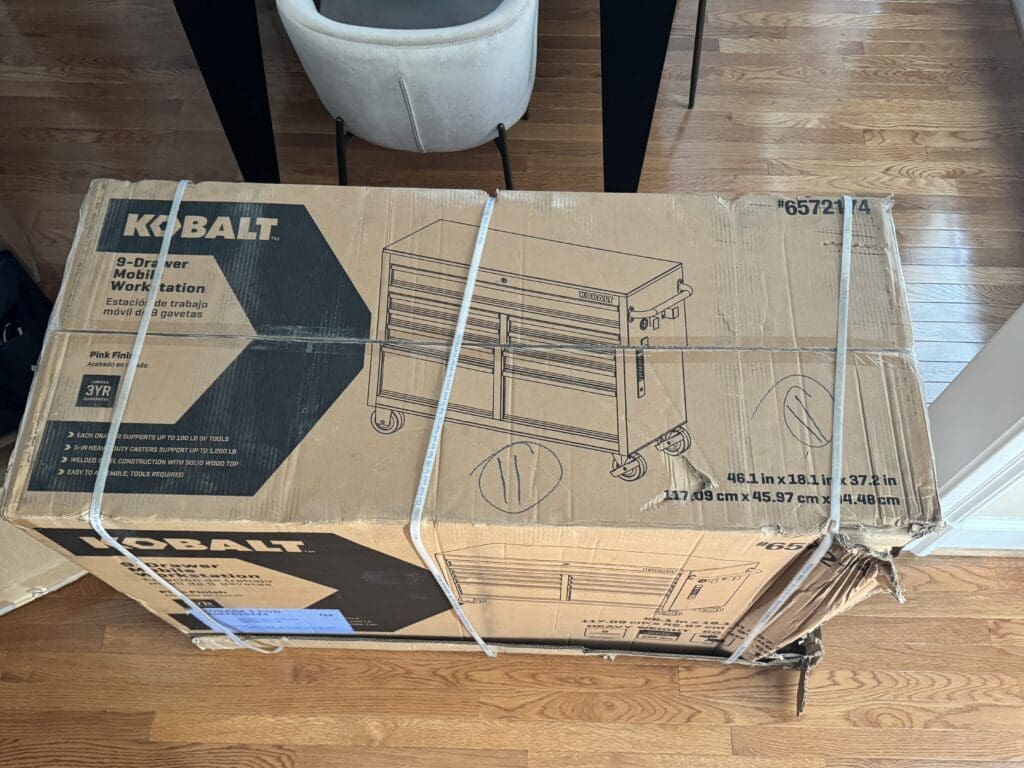
[Insert a “Before” photo here: either of your old, sad ironing setup or the new Kobalt cart in its box]
Why a Tool Cart is the Perfect Solution
At first glance, a mechanic’s tool cart might seem out of place in a sewing studio, but it’s actually the perfect foundation for a custom ironing station. Here’s why:
- Sturdiness: Unlike a wobbly ironing board, this thing is built to last. It’s made of steel and can handle heavy-duty use without shaking or tipping.
- Storage, Storage, Storage: With 11 drawers of varying sizes, it’s a dream for organizing all my pressing tools, notions, and supplies. Everything has a home, right where I need it.
- Mobility: The heavy-duty wheels mean I can easily move my entire pressing station around my studio. I can roll it next to my sewing machine for quick presses or tuck it away when I need more floor space.
- Built-in Power: The integrated power strip is a game-changer! I can plug in my iron, my Cricut EasyPress, and even a small lamp, all in one convenient spot.
The only challenge was the surface. The top of the cart was sturdy, but it was still a problem. I needed to figure out how to convert it into a heat-stable and perfectly padded pressing surface.
The Ultimate DIY Ironing Station: A Step-by-Step Guide
This was such a fun and rewarding project! Here is a full breakdown of the supplies I used and the steps I took to create my dream ironing station.
The Supply & Tool List:
- The 27-inch Kobalt Tool Cart (or a similar sturdy tool chest)
- For Option B: A piece of 3/4 inch plywood, cut to the size of the cart’s top surface
- Heat-resistant batting (like Insul-Bright)
- A layer of thick 100% cotton batting
- Heat-resistant, non-stick pressing cloth fabric for the top layer
- A heavy-duty staple gun and staples
- For Option A: Longer screws to re-attach the top
Creating Your Pressing Surface: Choose Your Method
When it comes to creating the top, you have two great options depending on your needs. Option A is to modify the existing top that comes with the cart, which is a bit faster. Option B is to build a brand new, thicker top using a piece of plywood, which is the method I chose for a super heavy-duty finish. Let’s break down both.
Option A: Modify the Existing Top (The Quick Method)
- Detach the Top: The first step is to unscrew the original top from the metal cart. To do this, you’ll likely need to remove the top drawer to access the screws from underneath the base. Keep the original screws handy for comparison.
- Layer and Staple: Place the detached cart top face down onto your layers of batting and heat-resistant fabric. Follow the “sandwich” and stapling process described in the next section to get a tight, smooth finish.
- Re-attach with Longer Screws: This is the key step. Because you’ve added the thickness of the batting and fabric, the original screws will be too short. You will need to replace them with slightly longer screws to securely re-attach your newly upholstered top to the cart base.
Option B: Build a New Plywood Top (My Method)
- Create the Base: The first step is to have a piece of 3/4 inch plywood cut to the exact dimensions of the top of your tool cart. Most hardware stores like Lowe’s or Home Depot can do this for you right in the store.
- Layer the “Sandwich”: Lay your plywood base on the floor. On top of that, place your layer of thick 100% cotton batting. This will give your pressing surface a nice, soft padding. Next, add your layer of heat-resistant batting like Insul-Bright. This is crucial for reflecting heat back up into your garment and protecting the wood.
- Add the Top Fabric: Place your final layer of heat-resistant pressing cloth fabric over the batting. Make sure all your layers are smooth and free of wrinkles. You should have at least 3-4 inches of excess fabric and batting hanging over all sides of the plywood.
- Get Stapling!: This is the most important part. Start on one of the long sides. Pull the fabric and batting layers taut around the edge of the plywood and, using your staple gun, place one staple in the center of the underside. Move to the opposite side, pull the fabric tight, and place another staple. Continue this process, working from the center out towards the corners, alternating sides to ensure a smooth, drum-tight surface.
- Attach the Top: Once your pressing board is complete, you can simply place it on top of the tool cart. The weight is often enough to keep it in place. For a more permanent solution, you can use industrial-strength adhesive or drive a few screws from inside the top of the cart up into the plywood.
The Big Reveal!
I am absolutely in love with the result. I now have a massive, sturdy pressing surface that’s at the perfect ergonomic height. The drawers hold all my scissors, thread, interfacing, and pressing hams. It’s a functional, beautiful, and completely custom piece of sewing furniture that has already saved my sanity countless times.
[Insert multiple beautiful “After” shots of the finished, styled ironing station from different angles, including a shot of the organized drawers]
This project proves that sometimes the best sewing room solutions aren’t found in a sewing store, but in the hardware aisle. With a little creativity, you can build the space of your dreams.
What’s the best sewing room hack you’ve ever tried? Let me know in the comments!